 |
||
| We were on tour in Seattle with our band Coracree when we were introduced to the old-fashioned art form of Moving Panoramas also known as Crankies. One look and we knew we had to make one! With our combined skills of carpentry, art, music and songwriting, it was as if we had trained our whole lives to make crankies. If you want to skip straight to the video of the finished piece, click HERE, otherwise read on for more details about how we made our crankie box and the Midnight Sea scroll. |
||
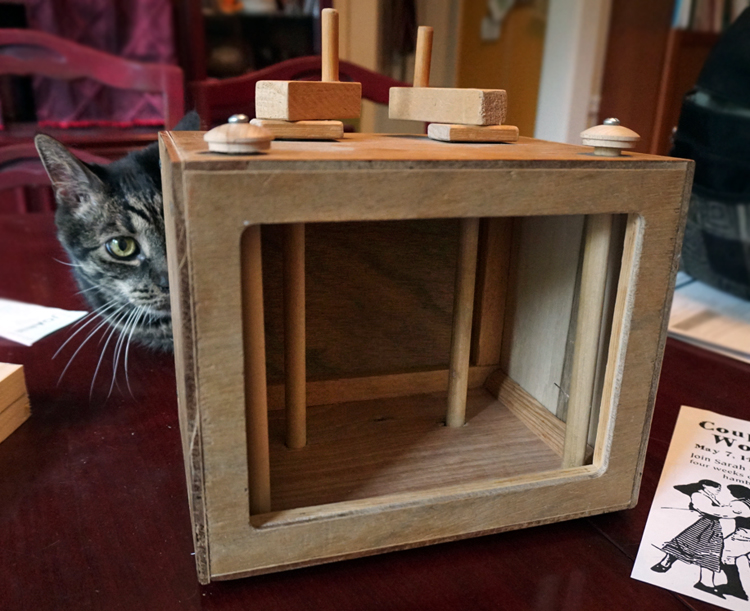 |
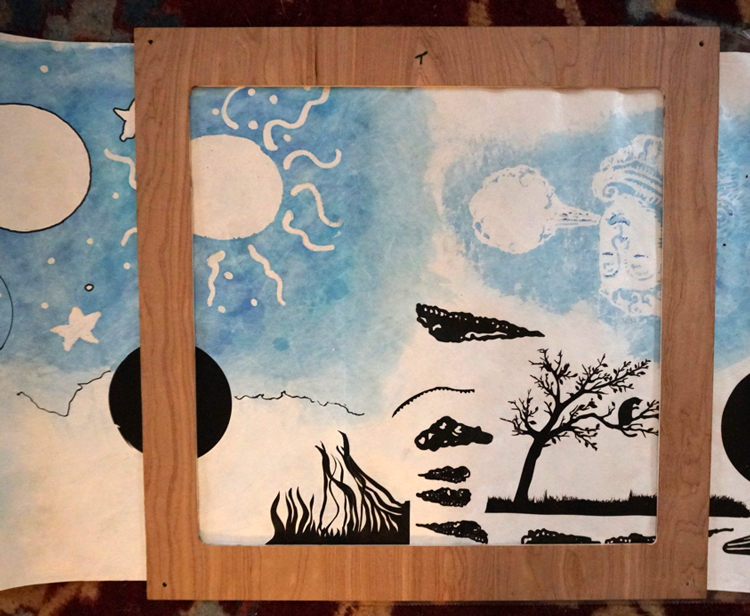
First we had to make a crankie box. Bill went online to see what other people had made and then sketched out some ideas of his own. The first box he made was pretty small - about 7.5" x 7.5" x 9.5" and held a 6" roll of paper. Sarah immediately pronounced it charming, but TOO SMALL. | |
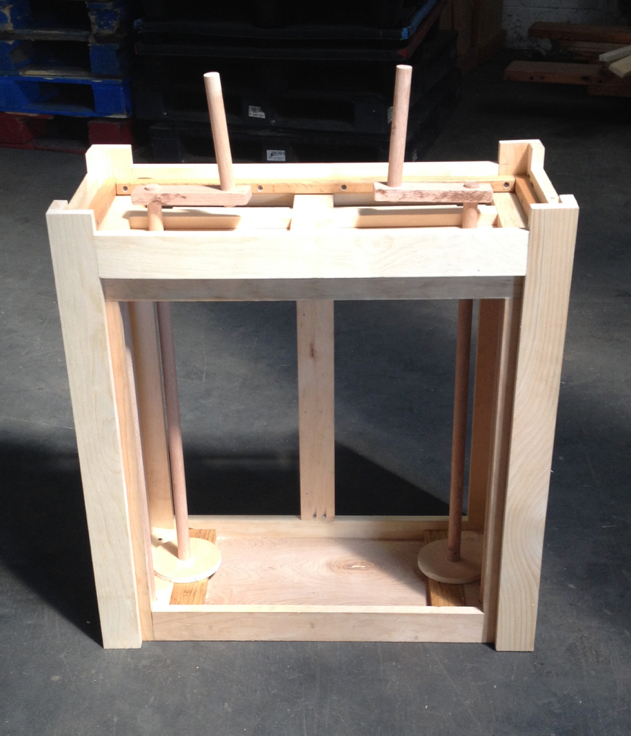
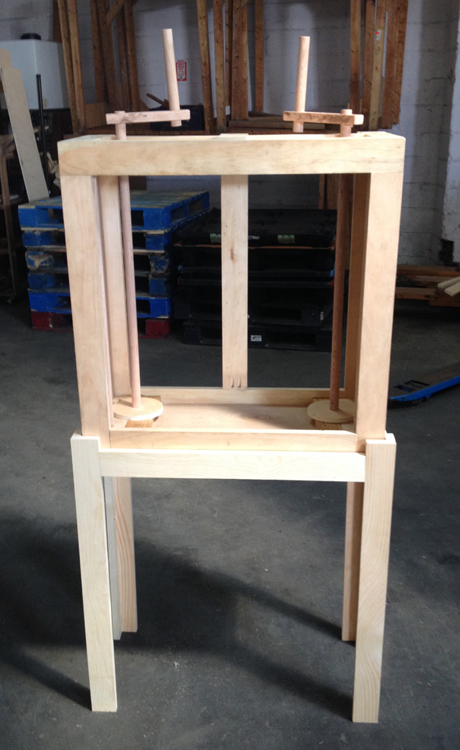
Before Bill built another box, we decided to buy the roll of material so we'd know what width we'd need to accomodate. Sarah settled on a 300' roll of 22.5" artist's tyvek from Material Concepts. This would be enough to make several crankie rolls. Bill then got to work building our custom crankie box. The box is 27" x 27" x 12" with a 19" square opening. The lights inside come from four battery-powered LED closet lights we got at the hardware store. There is a fabric panel that velcroes to the back which is white on the inside to reflect light and black on the outside to keep light from leaking during the crankie show. Two dowels inside are permanently attached as spacer posts to keep the roll moving smoothly. The tyvek roll is taped onto two larger dowels with the crankie handles attached and the handles are pinned together so we can break them down, as needed.
|
 |
|
| One thing that makes our crankie box special is that it travels with its own stand that fits neatly over the outside! |
|
|
|
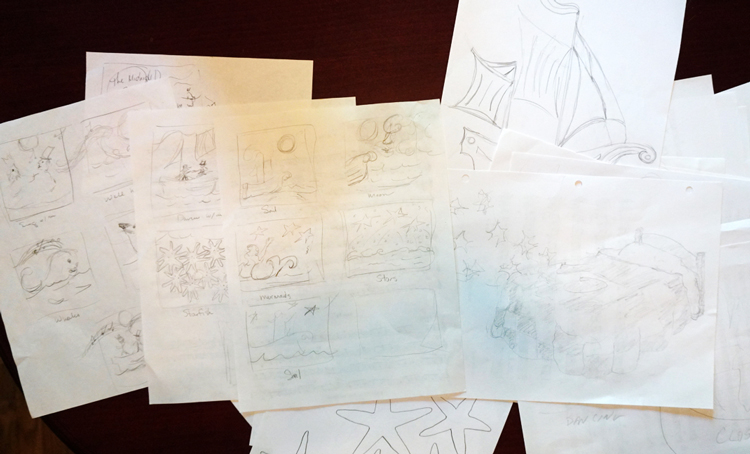
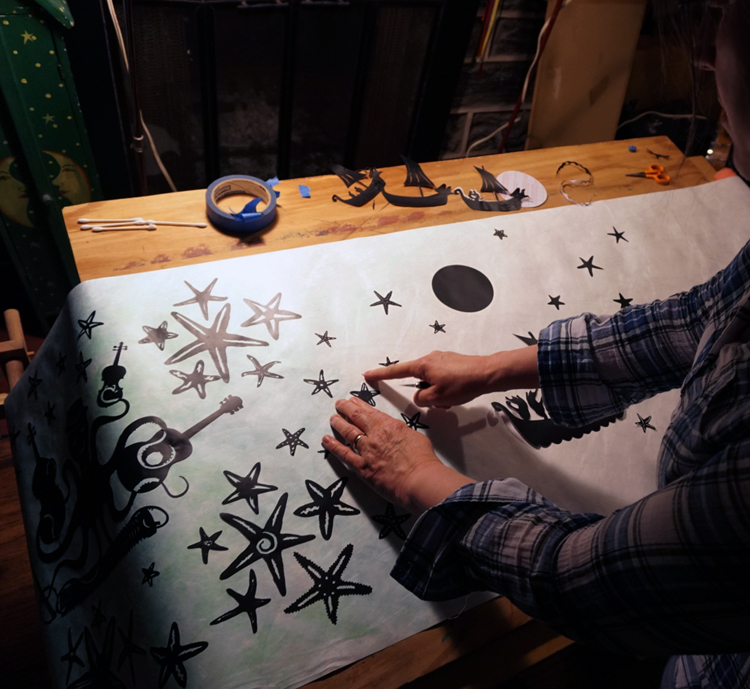
With a working crankie box, we were ready to start on the artsy parts. While Bill was building the crankie box, Sarah was writing the song she knew she wanted to use as the storyline. We spent several evenings making story boards, comparing notes and swapping ideas. Many sketches later, we had a pretty good idea of how we wanted it to look. Part of the testing process was figuring out exactly how many feet of tyvek we would need for each verse. We loaded our test roll in and started cranking and measuring while Sarah sang. (It turned out to be about 7 feet per verse.) This gave us a good feel for how many images we would need per verse. | |
 |
||
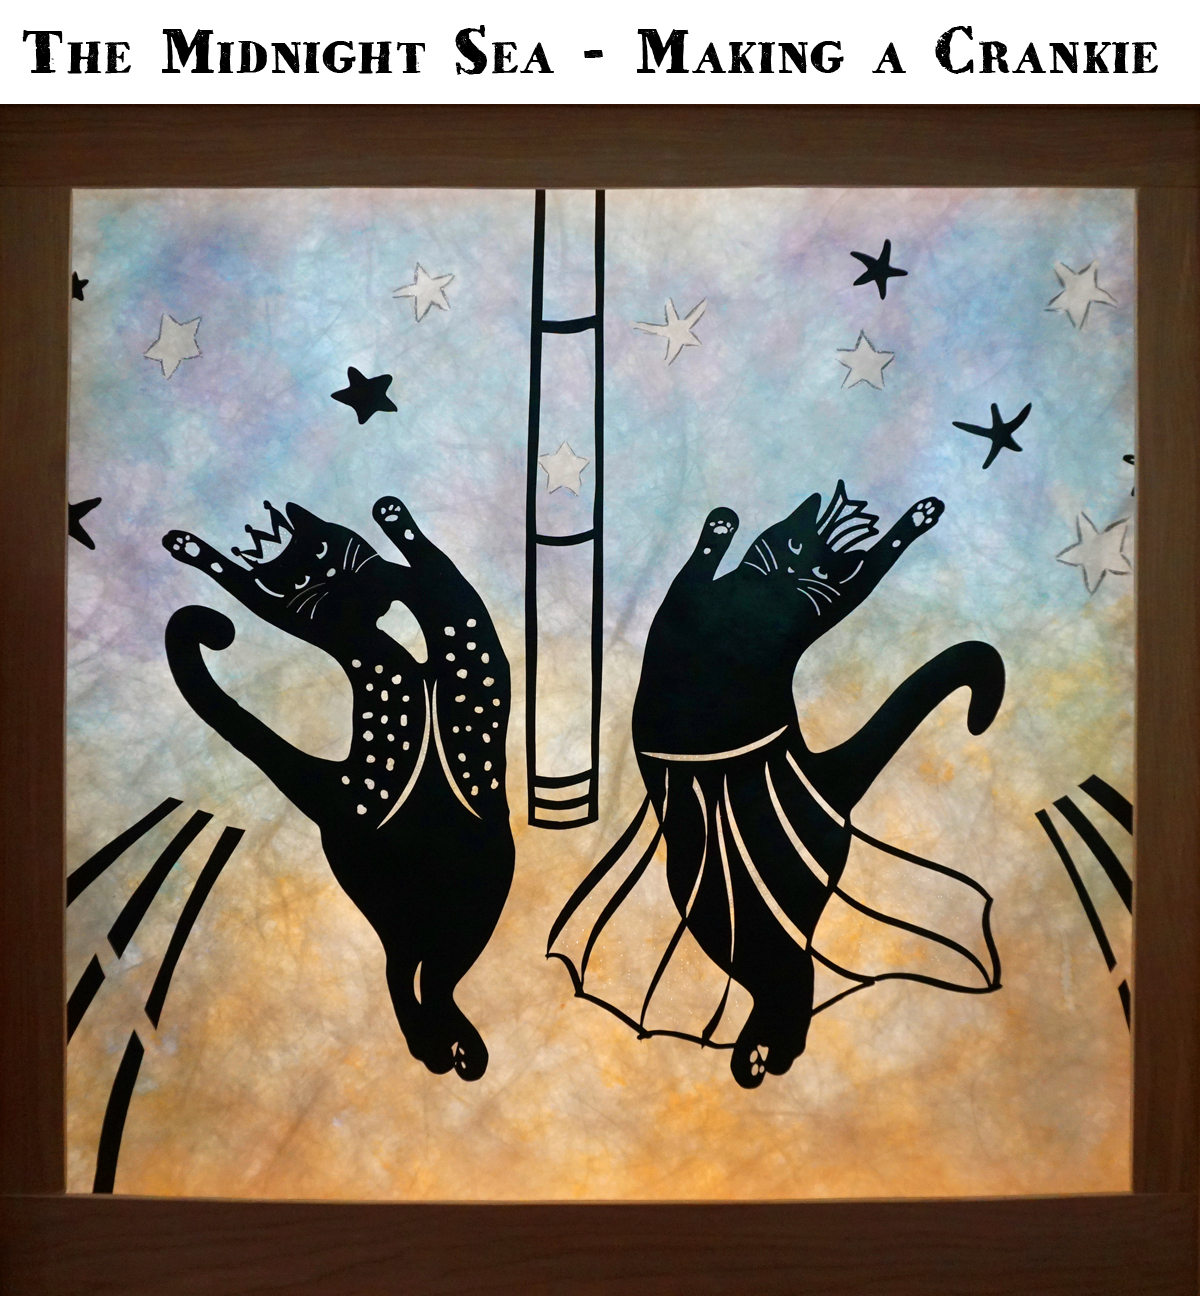
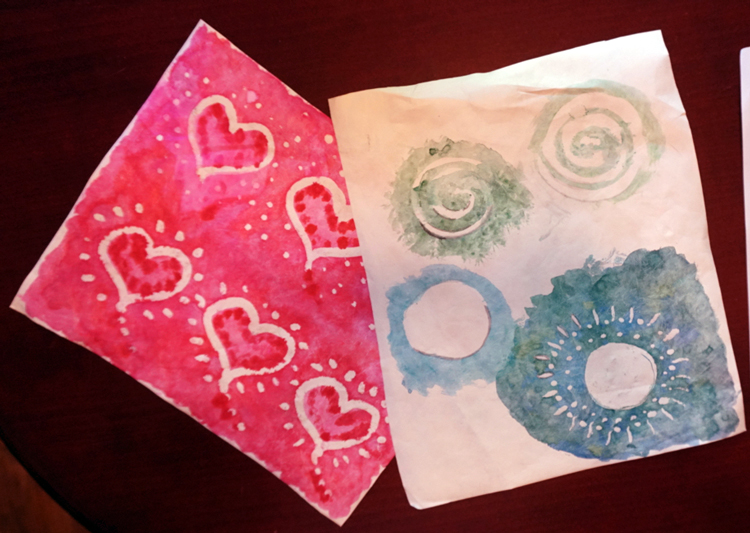
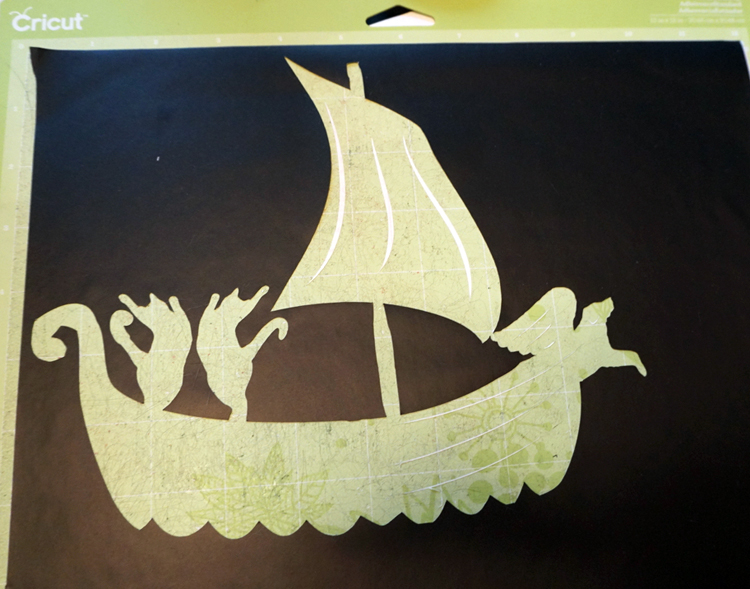
| We did a lot of testing with materials - paper applique, paints, dyes, markers, and various kinds of resist techniques. Most paints were too opaque for the transluscent effect we wanted, and Rit fabric dye wasn't rich enough, but the student grade Blick Liquid Watercolors seemed like a good choice. They aren't as intense or lightfast as the much pricier the premium liquid watercolors, but they're affordable and come in great big bottles. The ten colors in a box should cover just about any crankie color need. For the places we wanted to stay white, we needed a resist or mask. We messed around with liquid frisket and rubber cement (too fussy and messy) and hot glue (do NOT put anything hot on tyvek - it MELTS!) and ended up using contact paper/shelf liner which masked beautifully and peeled off easily. As it turned out, the black contact paper was also perfect for the silhouette designs. Cut it out, stick it on - it's like the best colorforms ever! We thought we would have to put a clear covering over the appliqued pieces, but the contact paper stuck surprisingly well. For the really intricate designs, we found signmaker's transfer paper to be especially helpful for keeping the piece from sticking to itself and getting hopelessly tangled when we moved it from the cutting mat to the tyvek roll. | ||
 |
 |
|
 |
 |
|
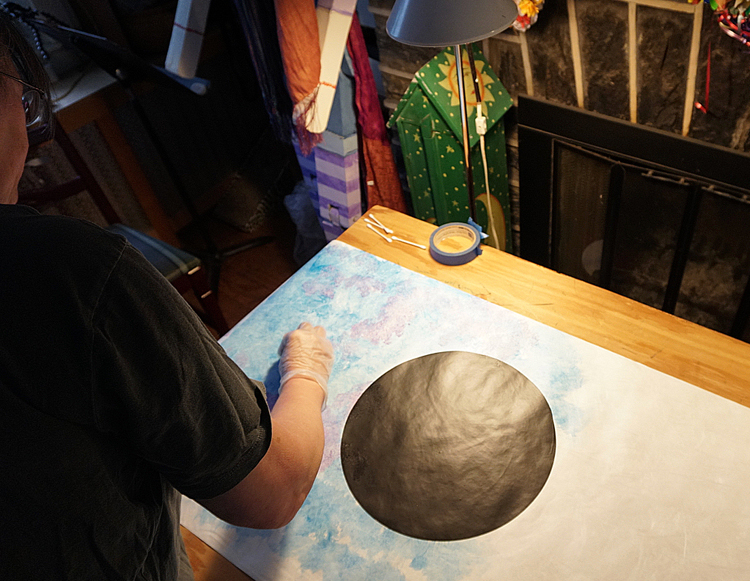
| We needed a work table that would be comfortable enough to work standing up and somewhat inaccessable to the cats that share our house. An old Ikea desk we had in the attic was pretty good, though we wish it was a little taller. We topped it with a sheet of plywood to keep it clean and add a little more square footage. An ethafoam pool noodle slid over the sharp edges protected the tyvek from creasing and to avoid getting hard lines in the soft sponged background colors. Bill fashioned roll holders on each end to hold the large roll of tyvek on one side and the finished part on the other. | 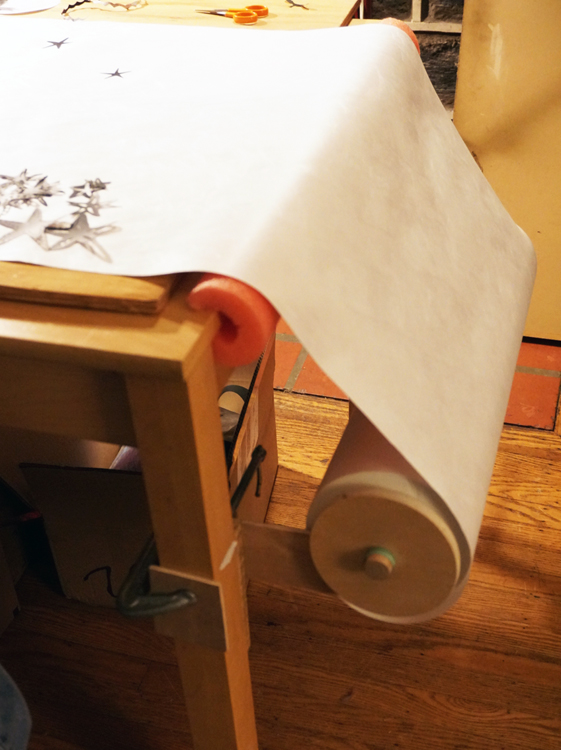 |
|
| Both of us have a lot of experience doing intricate papercuts by hand and knew that hand cutting a project this size was not only daunting, but would probably give us some sort of tendonitis and interfere with our music fun; so we quite willingly went straight for the technological solution that would help us realize our designs without sacrificing our health - a Cricut cutting machine. Bill had gotten it for Sarah a couple of years ago and though we had experimented with it, we hadn't yet done a full-fledged project. We drew out our designs, scanned them into the computer, told the machine what to cut and what to leave, and it did all the hard cutting work for us. I could write a whole page on the advantages and disadvantages of this particular machine, but it is what we have and it worked for us. | ||
 |
 |
|
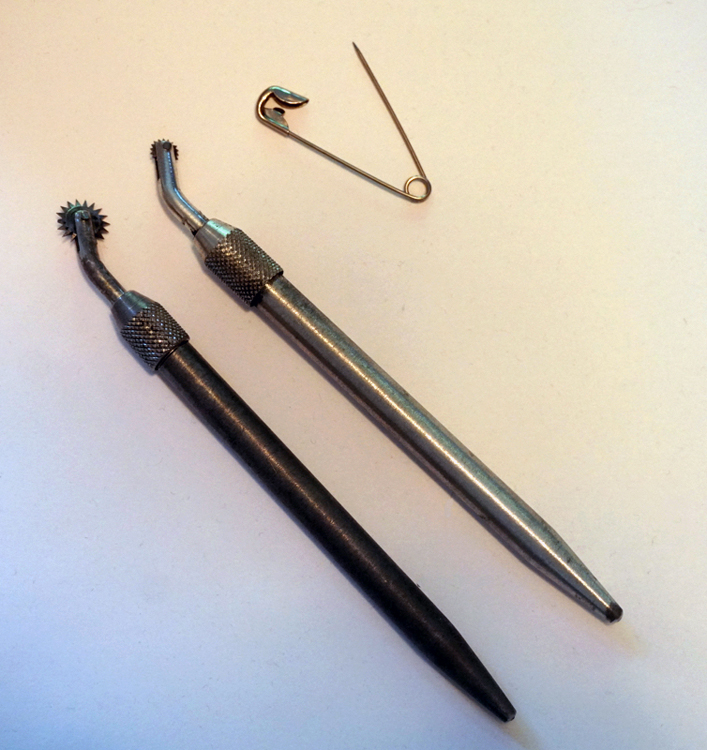
| With the storyboards on hand and the song in our head, we got to work. It was a process of masking out the places we wanted to stay white, sponging on the watercolors with sea sponges and rags, then cutting out and applying the silhouette images. Final embellishments included a little shadowing with grey brushmarkers and finally poking holes in the tyvek where we wanted the backlight to shine through making the stars "sparkle". Sarah did this with a safety pin until she remembered she has a couple of pounce wheels that roll along making perfect tiny holes. Bill had made a test "window" the size of the crankie box window we could move over our design to help visualize how the final moving crankie would look. It really helped to size the scenes, though I imagine as we get more experience making these we won't need it as much. The one thing that would have made the whole process easier was if the work table was also a light table so we could see how it would look backlit as we went along. Maybe next time! | ||
 |
 |
|
| Once the design was done and we cut it from the main roll, we were ready for our first runs. BIG PROBLEM - tyvek is slippery stuff and needs constant, even tension to keep from sliding down the roll and crumpling along the edges or creasing in the middle. We finally hit upon making some friction pads that rested against the crank dowels and slowed down the turning just enough to keep the tyvek at the right tension. Perfect! Nice even tension and no creasing or crumpling! |  |
|
Watch the video!
|
||
So this is a fairly complex crankie project, but they don't have to be this hard. We've seen crankies made from wood or cardboard boxes, tissue boxes, and even matchboxes. The scroll can be tyvek, fabric, or any kind of paper. Some are backlit, some are not. They can be decorated with pen and ink, marker, applique or more fabric. The scroll can illustrate a song, a story or just be a series of beautiful images. |
||